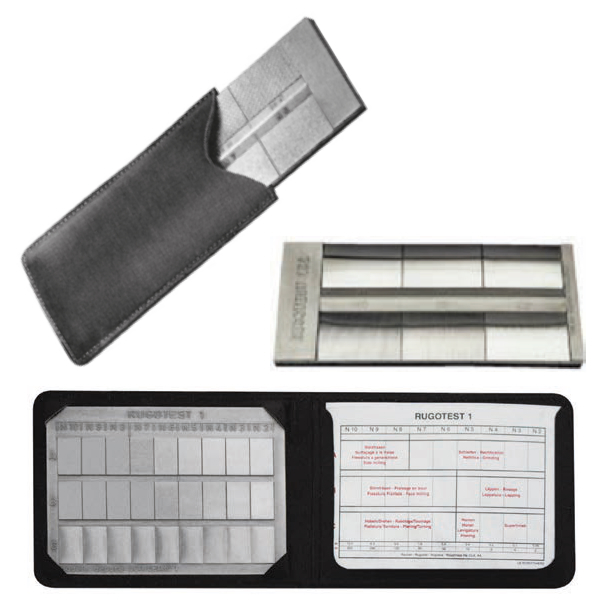
Rugotest surface roughness comparator, Visual Ra reference for machining surfaces
SKU: 651xxxEnables fast visual and fingertip comparison of machined surfaces. The stainless steel reference plates represent defined Ra ranges and ISO roughness classes for standard machining methods. Rugotest supports shop-floor inspection, training, and clear communication of surface finish requirements without electronic measurement.
Rugotest surface roughness comparator supports fast and consistent visual roughness evaluation in machining environments. The set relies on direct comparison by sight and fingertip touch. This approach suits workshops where electronic measurement feels unnecessary or impractical.
Rugotest follows ISO 2632, ISO/R 468, and NF E 05-501 standards. Each specimen represents a defined surface roughness range. The plates reflect real machining textures, not theoretical profiles. Users compare the workpiece surface directly against reference samples.
All Rugotest plates use stainless steel as the base material. Stainless steel maintains surface stability over time. Oxidation does not alter the tactile feel or visual appearance. This stability matters for long-term reference use in production and training.
Rugotest surface roughness comparator
Visual Ra reference for machining surfaces
Rugotest covers standard machining processes found in mechanical workshops. Each variant corresponds to one specific process. Mixing textures between processes is avoided. This structure keeps comparisons intuitive and repeatable.
The Rugotest range includes nine variants, each defined by machining method, Ra range, and ISO roughness class.
Rugotest variants overview
| Part number | Machining method | Number of plates | Ra comparison range (µm) | ISO class | Plate size (mm) |
|---|---|---|---|---|---|
| 651001 | General machining reference | 27 | 0.05–12.5 | N2–N10 | 120 × 90 |
| 651002 | Sand blasting | 6 | 0.8–25.0 | N6–N11 | 120 × 90 |
| 651003 | Shot blasting / grit blasting | 18 | 0.0125–25.0 | N0–N11 | 120 × 90 |
| 651101 | Planing | 6 | 0.8–25.0 | N6–N11 | 110 × 50 |
| 651102 | Turning | 6 | 0.4–12.5 | N5–N10 | 110 × 50 |
| 651103 | Face milling | 6 | 0.4–12.5 | N5–N10 | 110 × 50 |
| 651104 | Surface grinding | 8 | 0.025–3.2 | N1–N8 | 130 × 50 |
| 651105 | Cylindrical grinding | 8 | 0.025–3.2 | N1–N8 | 130 × 50 |
| 651107 | Spark erosion (EDM) | 6 | 0.4–12.5 | N5–N10 | 110 × 50 |
Rugotest does not replace a surface roughness tester. Instead, it provides immediate reference feedback. Operators quickly judge whether a surface matches a specified Ra class. This method speeds up in-process checks and shop-floor decisions.
Rugotest surface roughness comparator
Training benefits strongly from Rugotest use. New operators learn how machining methods influence surface texture. Engineers and inspectors align their surface perception. Misunderstandings during acceptance discussions reduce significantly.
Rugotest also supports communication with customers and suppliers. Physical reference samples explain surface requirements better than numeric values alone. Discussions move faster when both sides touch the same reference.
Typical applications include turning shops, milling centers, grinding operations, and EDM departments. Rugotest also appears in vocational training centers and technical classrooms. The set works without power, calibration, or software.
Rugotest surface roughness comparator remains a practical reference tool. It bridges visual perception and standardized roughness classes. Combined with electronic roughness measurement, Rugotest strengthens surface quality control consistency across machining workflows.


