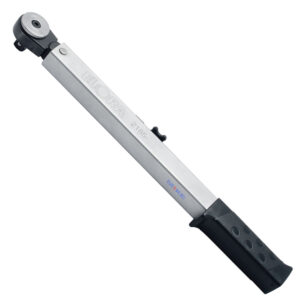
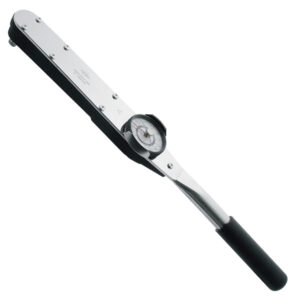
Clicking torque wrench with vernier scale Why is controlled fastener tightening important? Anyone involved in modern engineering will already know how important controlled tightening is. To ensure safe, dependable threaded joints, clearly defined tightening forces are essential, irrespective of whether the forces to be applied are large or small (such as is the case with light-weight materials with a low yield point).
The decision on the correct tightening force is subject to a number of factors. These include the fastener’s thread pitch, the friction in the thread and the material under the nut or screw head. Once all the relevant factors have been taken into account, this results in the required tightening force that will ensure the bolted joint will not become loose even under dynamic loading. By the same token, this tightening force must not be too high as this can also cause the bolted joint to fail.
What exactly is torque?
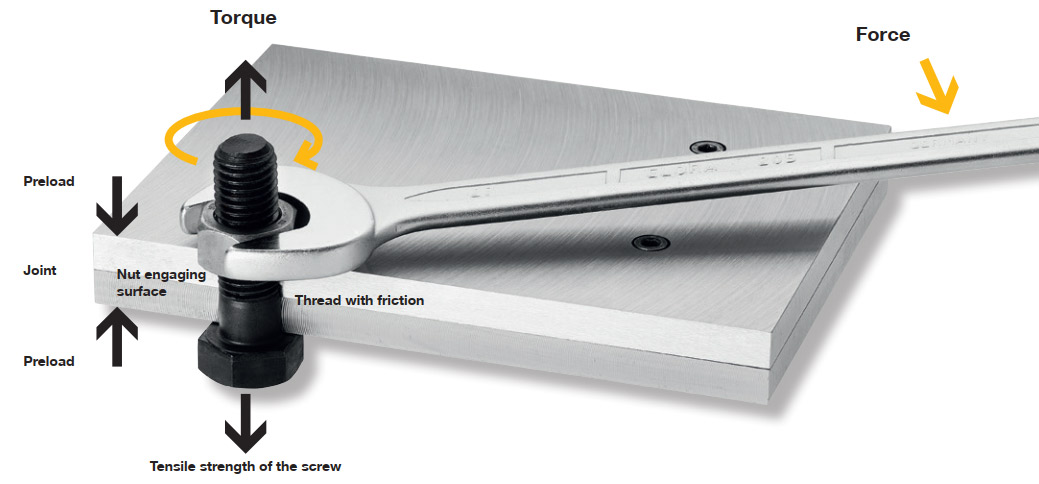
Torque is a physical quantity in mechanics. The international unit of measure for moment of force, or torque, is the newton metre, Nm. Torque is defined as a force acting perpendicular to a moment arm. M = F x r
A torque wrench is constructed in such a way that it is operated by applying force to the handle. If the lever ratio is changed in any way, this will result in incorrect torque values – a key issue that is referred to in the documentation for all ELORA torque wrenches.
Screw tightening using torque and tightening angle
In many cases, it is sufficient to tighten a bolt or screw to a certain defined torque. To ensure the application of accurate, defined tightening forces, special expanding screws are used. Screws of this type may only be used once. In the first stage, they are tightened to a defined torque and then a specified tightening angle is applied to tighten the screw beyond the elastic limit of the bolt. This enables a much more accurate tightening force to be achieved.
In addition to an ELORA torque wrench, angle controlled tightening requires a mechanical angle measuring instrument (ELORA no. 2184…).
Conformity Test and Calibration for torque wrench
The DIN EN ISO 6789:2017 has been divided into 2 parts. Part 1 determines requirements for construction and manufacturing, including contents of the declaration of conformity.
Part 2, above all, determines the requirements for traceable calibration certificates and includes a procedure to calculate measurement uncertainties.
The ELORA Torque Wrench Calibration Laboratory is covering both parts. Each torque wrench will be delivered with a declaration of conformance, because for most users, this is absolutely sufficient.
In case of not being differently mentioned within inspection equipment monitoring, the DIN EN 6789:2017 specifies a working life of 12 months or 5000 load changes being the interval for conformity test or calibration. The interval starts with the first use of the torque tool.
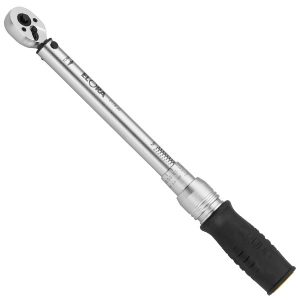
TORQUE WRENCH WITH VERNIER SCALE 2179 Series
Product features
- Broad range of applications
- High degree of availability
- Highly economical
- Very service-friendly
- Complies with DIN EN ISO 6789:2017
- for controlled torque application from 10 – 335 Nm
- main unit Nm with Nonius, secondary unit ft.lb.
- safe locking of the adjusted torque value by securing button at the handle end
- ELORA-No. 2179-S: exchanging the locking knob through the safety cap, the torque can be fixed tamper-resistant
- for clockwise fixing

- with robust, matt steel tube
- fine tooth ratchet, smallest possible swivel angle 8°
- very noticeable and hearable (click) signal
- nonslip QUATROLIT®-2C-handle
- according to EN ISO 6789:2017 Part 1, Typ II Class A
- with traceable declaration of conformance
- tripping accuracy ±3%
| Number | Square | Range Nm |
Range ft.lb. |
lenght mm |
Weight g |
| 2179-60 | 3/8“ | 10-60 | 0,25 | 1250 | |
| 2179-125 | 1/2“ | 25-125 | 0,25 | 1230 | |
| 2179-200 | 1/2“ | 40-200 | 0,5 | 1366 | |
| 2179-335 | 1/2“ | 65-335 | 0,75 | 1465 |
ELORA has succeeded in achieving the ambitious objective of increasing the periods of effective use between readjustments to considerably more than 5000 “clicks” with no errors or loss in accuracy. Extensive long-term tests have demonstrated convincingly that the torque wrenches managed 8000 “clicks” with no problems.
ELORA – Declaration of Conformity
Each hand operated torque tool leaves our works with a declaration of conformance according to DIN EN ISO 6789:2017 Part 1. ELORA services and controls your torque wrenches quickly and cost-saving. On demand also according to DIN EN ISO 6789:2017 part 2.
Wide range of applications
The torque wrench must work accurately even when subjected to extreme fluctuations in temperature and in environments in which dust and moisture are commonly encountered. This is why ELORA torque wrenches are intensively tested under all conceivable operating conditions at ELORA’s own calibration laboratory. The ELORA torque wrenches have all passed the tests with flying colours.
A particularly important feature is the temperature from -15 to +40°C. The design of the tool, the torquing mechanism and the choice of components and materials are further evidence of ELORA’s innovative approach to professional products enabling efficient working.
This is how you can fix the torque tamper-resistant
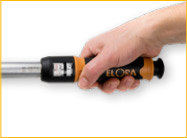 Adjust release torque Adjust release torque |
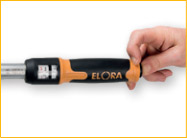 Fix with locking knob Fix with locking knob |
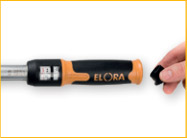 Untwist locking knob Untwist locking knob |
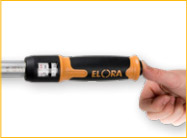 Tamper-resistant closing by safety cap Tamper-resistant closing by safety cap |
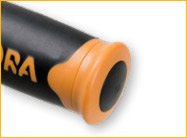 No nondestructive removal of the safety cap No nondestructive removal of the safety cap |
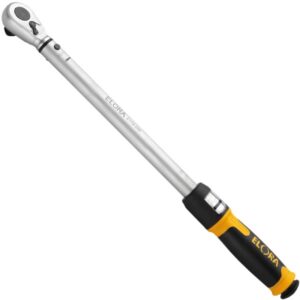
2185- TORQUE WRENCH 1/2 inch
- for controlled torque application from 20 – 350 Nm / 15 – 250 ft.-lb.
- dual measurement scale for Nm and ft.lb.
- scale slider and window with magnifier for quick setting of the target torque value
- locking screw for safe locking of the set torque value

| Number | Square | range Nm |
range ft.lb. |
l/mm | Weight/g |
| 2185-100 | 1/2″ | 20-100 | 15-80 | 450 | 1473 |
| 2185-200 | 1/2″ | 40-200 | 30-150 | 450 | 1432 |
| 2185-350 | 1/2″ | 60-350 | 42-250 | 590 | 1705 |
- for clockwise fixing
- with robust, matt steel tube
- all models with fine tooth, reversible ratchet
- very noticeable and audible (click) signal
- according to DIN EN ISO 6789:2017 Part 1, Typ II Class A
- with traceable declaration of conformance
- tripping accuracy ±4%
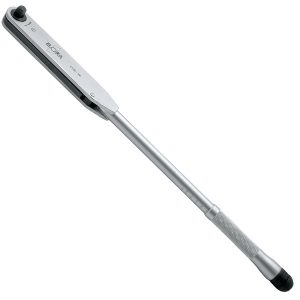
2130 – 2160 TORQUE WRENCH, Push Through
Torque for controlled torque application from 2,5 – 2000 Nm. Quad measurement scale for Nm, kgm, in-lb and ft-lb. click type torque wrench with very noticeable and audible (‘click‘‘) signal. bBi-directional fixing by turning the torque wrench. Extra solid, matt-chrome plated steel construction, adjustable and safe lockable by crank and the top end of the handle.

According to DIN EN ISO 6789:2017 Part 1, Typ II Class A. With traceable declaration of conformance. Tripping accuracy ±4%
| Number | Square | Measuring range Nm |
Gradution Nm |
Measuring range kgm |
Gradution kgm |
| 2130-11 | 3/8“ | 2,5-11 | 0,5 | 0,3-1,2 | 0,2 |
| 2130-33 | 3/8“ | 7-33 | 1 | 0,7-3,4 | 0,1 |
| 2130-68 | 3/8“ | 12-68 | 2 | 1,2-7 | 0,2 |
| 2140-68 | 1/2“ | 14-68 | 2 | 1,4-7 | 0,2 |
| 2140-135 | 1/2“ | 30-135 | 5 | 3-14 | 1 |
| 2140-225 | 1/2“ | 50-225 | 10 | 5-23 | 1 |
| 2140-330 | 1/2“ | 70-330 | 10 | 7-35 | 1 |
| 2150-810 | 3/4“ | 200-800 | 20 | 22-82 | 2 |
| 2160-940 | 1“ | 200-1000 | 20 | 22-100 | 2 |
| 2160-2000 | 1“ | 500-2000 | 50 | 50-200 | 5 |
Continue
| Number | Measuring range in.lb. |
Gradution in.lb. |
Measuring range ft.lb. |
Gradution ft.lb. |
l/mm |
| 2130-11 | 20-100 | 10 | 2-8 | 1 | 338 |
| 2130-33 | 60-300 | 10 | 5-24 | 1 | 425 |
| 2130-68 | 100-600 | 20 | 10-50 | 2 | 500 |
| 2140-68 | 125-600 | 20 | 10-50 | 2 | 500 |
| 2140-135 | 250-1200 | 50 | 40-160 | 2 | 556 |
| 2140-225 | 400-2000 | 50 | 40-160 | 5 | 600 |
| 2140-330 | 600-3000 | 100 | 50-250 | 10 | 805 |
| 2150-810 | 1800-7200 | 200 | 140-600 | 20 | 1070 |
| 2160-940 | 1800-8850 | 200 | 140-740 | 20 | 1400 |
| 2160-2000 | 4500-17500 | 500 | 350-1500 | 50 | 1410 |
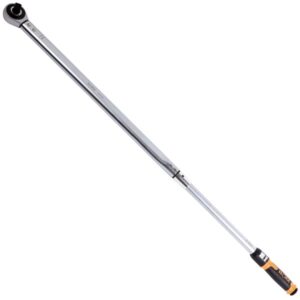
2070- TORQUE WRENCH 3/4 inch WITH VERNIER SCALE
- for controlled torque application from 100 – 1000 Nm
- main measurement unit for Nm with vernier scale, auxiliarymeasurement unit for ft.-lb.
- Safe locking of the adjusted torque value by securing button at the handle end
- ELORA-No. 2179-S: exchanging the locking knob through the safety cap, the torque can
- bi-directional fixing by turning the torque wrench
- push through ratchet 3/4 inch with smallest swivel angle 6°

| Number | Measuring range Nm |
Graduation Nm |
Measuring range ft.lb. |
Graduation ft.lb. |
l/mm | Weight/g |
| 2070-500 | 100-500 | 25 | 80-400 | 1,25 | 910 | 3600 |
| 2070-800 | 160-800 | 40 | 120-600 | 2 | 1220 | 4550 |
| 2070-1000 | 200-1000 | 50 | 150-750 | 2,5 | 1230 | 4550 |
- with robust, matt steel tube
- with very noticeable and audible (click) signal
- nonslip QUATROLIT®-2C-handle
- according to EN ISO 6789:2017 Part 1, Typ II Class A
- with traceable declaration of conformance
- tripping accuracy ±4%
TORQUE WRENCH 1 inch WITH VERNIER SCALE
- for controlled torque application from 400 – 2100 Nm
- main measurement unit for Nm with vernier scale, auxiliary measurement unit for ft.-lb.
- Safe locking of the adjusted torque value by securing button at the handle end
- ELORA-No. 2179-S: exchanging the locking knob through the safety cap, the torque can be fixed tamper-resistant
- for clockwise fixing
- reversible ratchet 1 inch with smallest swivel angle 6°

| Number | Range Nm |
Grad Nm |
Range ft.lb. |
Grad ft.lb. |
l mm |
Weight g |
| 2080-2100 | 400-2100 | 100 | 300-1500 | 5 | 1945 | 10750 |
- with very noticeable and audible (click) signal
- Extension Bar with nonslip QUATROLIT®-2C-handle
- according to EN ISO 6789:2017 Part 1, Typ II Class A
- with traceable declaration of conformance
- tripping accuracy ±4%
2178-20 TORQUE RATCHET, 1/4 inch WITH VERNIER SCALE
- for controlled torque application from 4 – 20 Nm
- main unit Nm, secondary unit ft.lb, both with Nonius
- safe locking of the set torque value
- for clockwise fixing
- with robust, matt-chrome plated steel tube

- reversible ratchet
- very noticeable and audible (click) signal
| Number | Measuring range Nm |
Graduation Nm |
Measuring range ft.lb. |
Graduation ft.lb. |
l/mm |
| 2178-20 | 4-20 | 0,1 | 3,3-14,4 | 0,07 | 320 |
- according to DIN EN ISO 6789:2017 Part 1, Typ II Class A
- Classified according to DIN EN ISO 6789: 2003 Type II Class A
- with traceable declaration of conformance
- Tripping accuracy ±4%
- Square: 1/4″
- Weight: 900 g
2011-1000 TORQUE SCREWDRIVER, 1/4 inch WITH VERNIER SCALE
- for controlled torque application from 2 – 10 Nm
- a disengaging coupler indicates the achievement of the release moment and prevents overtightening of the screw
- ¼ inch internal hexagon socket for ¼ inch bits according to DIN 3126-C 6,3
- bi-directional tightening
- safe locking of the adjusted torque value by securing button at the handle end
- ¼ inch square socket at the end of the screwdriver ensuring support of power transmission
- according to EN ISO 6789:2017 Part 1, Typ II Class D
- with traceable declaration of conformance
- tripping accuracy ±6% from the set value

| Number | Measuring range Nm |
Graduation Nm |
l/mm | Pieces | Weight/g |
| 2011-1000 | 2-10 | 0,2 | 160 | 1 | 330 |
CLICKING TORQUE WRENCHES AND INSERT TOOLS
2033-20 TORQUE WRENCHES WITH RECTANGULAR INTAKE
- with very noticeable and audible (click) signal
- nonslip QUATROLIT®-2C-handle
- factory depth gauges: Ss = 17,5 mm (9 x 12 mm) and Ss = 25 mm (14 x 18 mm)
- according to DIN EN ISO 6789:2017 Part 1, Typ II Class A
- with traceable declaration of conformance
- tripping accuracy ±4%

| Number | Drive mm | Is mm |
range Nm | Grad Nm |
range in.lb. |
Grad in.lb. |
l mm |
Weight g |
| 2033-20 | 9×12 | 282,5 | 4-20 | 0,1 | 39,8-172,6 | 0,9 | 315 | 595 |
- for use with ELORA interchangeable spanner heads
- main measurement unit for Nm with vernier scale, secondary measurement unit for ft-lb
- safe locking of the set torque value
- bi-directional fixing by turning the torque wrench
- with robust, matt steel tube
2034- TORQUE WRENCH WITH RECTANGULAR INTAKE
- for use with ELORA interchangeable spanner heads
- main measurement unit for Nm with vernier scale, secondary measurement unit for ft.-lb.
- safe locking of the adjusted torque value by securing button at the handle end
- ELORA-No. 2179-S: exchanging the locking knob through the safety cap, the torque can be fixed tamper-resistant
- for clockwise and anti-clockwise tightening by turning the torque wrench

- with robust, matt steel tube
- with very noticeable and audible (click) signal
- nonslip QUATROLIT®-2C-handle
- factory depth gauges: Ss = 17,5 mm (9 x 12 mm) and Ss = 25 mm (14 x 18 mm)
- according to DIN EN ISO 6789:2017 Part 1, Typ II Class A
- with traceable declaration of conformance
- tripping accuracy ±4%
| Number | Drive | Is | Nm | ft.lb. | lenght | Weigh | ||
| mm | mm | Range | Graduation | Range | Graduation | mm | g | |
| 2034-60 | 9×12 | 314,5 | 10-60 | 0,25 | 9-45 | 4 | 345 | 1000 |
| 2034-125 | 9×12 | 370,5 | 25-125 | 0,25 | 20-90 | 5 | 438 | 900 |
| 2034-200 | 14×18 | 410,0 | 40-200 | 0,5 | 30-150 | 10 | 455 | 1198 |
| 2034-335 | 14×18 | 470,0 | 65-335 | 0,75 | 50-250 | 10 | 515 | 1305 |
Expert knowledge on insert tools
When using insert tools, it is essential to take into account the stated extension.
If the extension for the insert tool to be used is exactly the same as the work calibration extension (Ss = 17.5 mm for 9 x 12 mm mounts and Ss = 25 mm for 14 x 18 mm mounts) of the torque wrench, the torque level you have set will be correct.
Where insert tools having a different extension value are to be used, the set torque Mi will have to be calculated to ensure that the required target torque (Ms) is, in fact, achieved.
This can be done using the following formula:

Where:
Ms target torque
ls lever length of the torque wrench + works calibration extension
Sv extension of the insert tool
Ss works calibration extension (Ss = 17.5 mm for 9 x 12 mm mounts and Ss =25 mm for 14 x 18 mm mounts)
Mi torque setting on the wrench
Torque Wrenches
Showing all 6 results
-
-
Torque Wrenches
Torque wrench 3/4″ ELORA 2070, with vernier scale
Torque wrench 3/4inch, for controlled torque application from 100 – 1000 Nm. Main measurement unit for Nm with vernier scale, auxiliarymeasurement unit for ft.-lb. Safe locking of the adjusted torque value by securing button at the handle end. Elora Germany.
SKU: 2070- -
Torque Wrenches
Torque wrench 2130-2160, push through square driver, Elora Germany
Torque Wrench 2130-2160 offers a broad torque range from 2.5 to 2000 Nm, featuring a quad measurement scale, click-type operation, and bi-directional fixing capability. It meets industry standards, ensuring precision with a traceable declaration of conformance and a tripping accuracy of approximately +- 4%. Elora Germany.
SKU: 2160- -
Torque Wrenches
Torrque wrench ELORA 2179 with vernier scale, Elora Germany
Torque Wrench 2179 offers precise torque control from 10 to 335 Nm with audible feedback, conforming to industry standards. It ensures reliability, durability, and comfort with a nonslip handle, making it a versatile tool for various applications. By Elora made in Germany.
SKU: 2179- -
Torque Wrenches
Torrque wrench 1/2″ 2185-, measuring range 20-350Nm, Elora Germany
Torque Wrench 1/2″ offers precise torque control within a range of 20-350 Nm, with a dual measurement scale (Nm and ft.-lb.), quick target torque setting, and a locking screw for safety. It complies with industry standards, emits an audible “click” signal, and comes with a declaration of conformance, ensuring dependable and accurate torque applications.
SKU: 2185- -
