Universal Coating Thickness Gauge professional, handheld device
Available on backorder
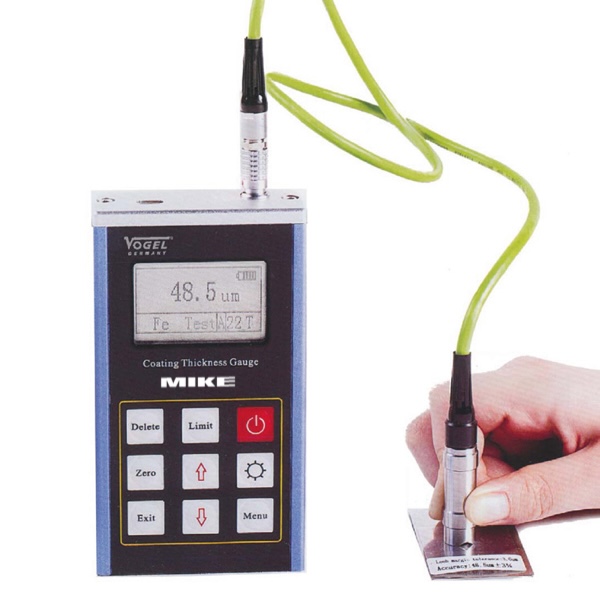
Universal Coating Thickness Gauge is a handheld device for measuring coating thickness on metals, featuring dual probes, a large backlit display, memory, and USB output. It’s durable, versatile, and includes calibration tools and software.
€ 988.0
Available on backorder
Description
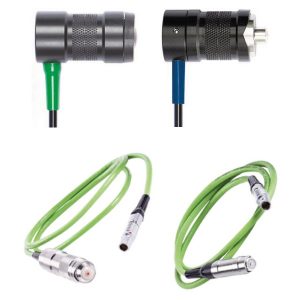
Universal Coating Thickness Gauge is a professional, easy-to-use handheld device designed for efficient coating thickness measurement. It incorporates a dual probe system for both iron/steel (Fe) and non-ferrous metals (NFe). The device features a large, easy-to-read display with a switchable backlight and a memory function for storing data.
Housed in a durable extruded aluminum case, this gauge is capable of working in any orientation, including horizontally, vertically, and even upside down. It’s particularly useful for measuring non-magnetic layers on metal surfaces and insulating layers on non-ferrous metals. The gauge finds applications in various fields like surface engineering, the automotive industry, electroplating, pipeline and aluminum industry, spray and plastic coating, mechanical engineering, bridge construction, and more.
Universal Coating Thickness Gauge 480227
Its robust design includes a soft keypad and a multifunctional display with a clear reading. The device alerts the user when the battery is low and automatically recognizes the probe type. It has a switchable alarm function and operates on the principles of magnetic induction (Fe) and eddy current (NFe). Measurements can be displayed in either micrometers or mils, and the gauge automatically recognizes the substrate, with options for manual or automatic shutdown.
- professional, handheld measuring device for quick and flexible coating thickness measurements
- combined system with 2 probes, for iron/steel (Fe) and non-ferrous metal (Ne)
- large display, with backlight (switchable), with memory function
- rugged extruded aluminium case, USB data output and with dataview software
- operates in any position (horizontal, vertical and upside down)
- for measurements of non-magnetic layers on metal surfaces (Fe) and measurements of insulating layers on non-ferrous metals (NFe)
- application fields include surface engineering, automotive industry, electroplating, pipeline construction, aluminium industry, spray coating, plastic coating, mechanical engineering, bridge construction, etc.
- rugged extruded aluminium body frame, with soft key pad
- multi-function display with clear reading, with backlight switchable
- with „low-battery“ indicator, autom. recognition of probe type, alarm function switchable
- magnetic induction measuring principle (Fe) and eddy current measuring principle (NFe)
- units in μm or mils, autom. substrate recognition, manual or autom. shut down function
- two measuring methods: continuous measurement and a single measurement
- 3 calibration methods: one point calibration, two point calibration and calibration with a roughened surface
- 5 calibration foil-set,1 x aluminium substrate block and 1 x iron substrate block
- 5 statistical values: mean value, max. value, min. value, standard deviation and numbers of measurements,
- storage of 500 measuring data in total
- min. radius of workpiece: convex 5 mm, concave 50 mm
- min. substrate thickness Fe (F1)-probe 0.75 mm, for NFE (N1)-probe 50 μm
- direct printing of the measured values by USB cable to PC or printer
- operating temperature -0 °C ~ 40 °C, rel. humidity 20 – 90 %RH
- inclusive 2x 1.5 V battery (type AA, art.-no.: 90003),
- with screw driver, data cable, dataview software, operation manual
The gauge offers two measurement methods: continuous and single measurement. It also provides three calibration methods: one-point, two-point, and calibration with a roughened surface. Included in the package are a 5-calibration foil set, an aluminum substrate block, and an iron substrate block.
The device can store up to 500 data points and calculates five statistical values: mean, maximum, minimum, standard deviation, and the number of measurements. It’s designed to work on a minimum radius of 5mm (convex) and 50mm (concave) and has minimum substrate thickness requirements for Fe and NFe probes.
Additionally, it allows for direct printing of measured values to a PC or printer via USB cable. The operating temperature range is from -0 °C to 40 °C, with a relative humidity tolerance of 20-90% RH. The package includes two 1.5V AA batteries, a screwdriver, data cable, DataView software, and an operation manual.


